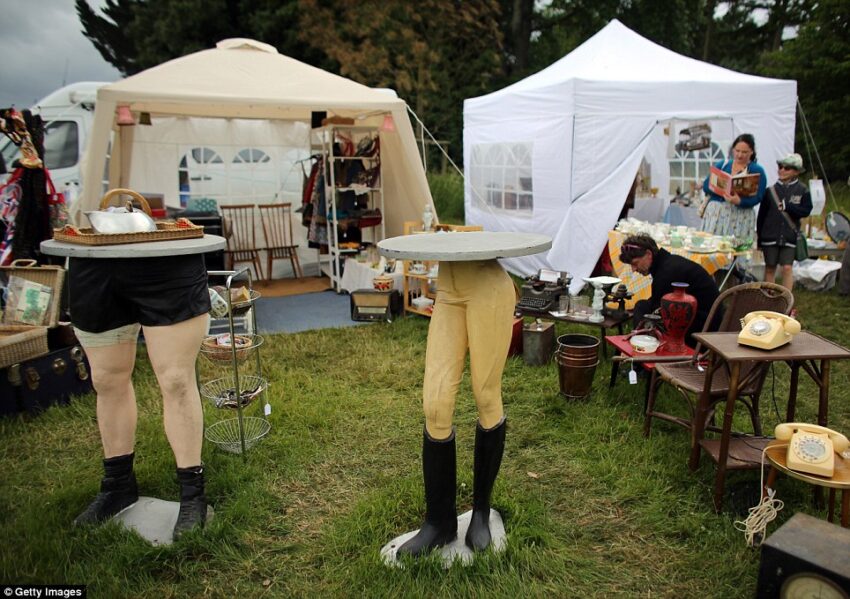
In the world of fashion, mannequins are a staple for displaying the latest trends and styles. But what happens when these mannequins retire from their fashion-forward duties? While some may end up in storage or discarded, creative individuals have found a new purpose for mannequin legs – transforming them into unique tables. These repurposed mannequin legs bring a touch of quirkiness and style to any space, making for a conversation-starting piece of furniture.
Why choose mannequin legs for table transformations?
When it comes to transforming furniture, there are countless options to choose from. However, if you’re looking for a unique and eye-catching piece that will surely be a conversation starter, then mannequin leg table are the perfect choice. Mannequin legs offer a distinct aesthetic that adds a touch of whimsy and creativity to any space. These elongated, sculptural forms instantly draw attention and create a sense of intrigue.
Whether you’re going for a modern and minimalist look or a more eclectic and bohemian style, mannequin legs can be transformed into stunning tables that perfectly complement your decor. One of the key advantages of using mannequin legs for table transformations is their versatility. These legs come in a variety of shapes, sizes, and materials, allowing you to select the perfect pair to suit your vision. Whether you prefer sleek and polished metal legs, vintage-inspired wooden ones, or even colorful and patterned options, the possibilities are endless.
Step-by-step guide to transforming mannequin legs into tables
In this step-by-step guide, we will walk you through the process of transforming mannequin legs into eye-catching tables.
Step 1: Gather the materials –
To begin, gather all the necessary materials. You will need a set of mannequin legs, preferably with a sturdy base, a circular tabletop of your desired size, a drill, screws, a screwdriver, sandpaper, and paint or varnish for finishing.
Step 2: Prep the mannequin legs –
Start by cleaning the mannequin legs thoroughly to remove any dust or dirt. If the legs have any visible imperfections, use sandpaper to smooth out the surfaces and create an even texture. This step will ensure better adhesion and a professional finish.
Step 3: Attach the tabletop –
Place the circular tabletop upside down on a clean and flat surface. Position the mannequin legs evenly around the perimeter of the tabletop, ensuring they are straight and balanced. Use a pencil to mark the areas where the legs will be attached.
Step 4: Drill pilot holes –
Using a drill, create pilot holes on the marked spots. These holes will make it easier for the screws to penetrate the tabletop and secure the legs in place.
Step 5: Secure the legs –
Align the drilled holes on the tabletop with the base of the mannequin legs. Insert screws through the holes and tighten them with a screwdriver. Ensure that the legs are securely attached to the tabletop, providing stability and support.
Step 6: Finishing touches –
Once the legs are firmly attached, it’s time to add the finishing touches. Depending on your preference, you can paint the legs to match your decor or leave them in their original form for a more eclectic look. Additionally, you can apply a coat of varnish to protect the surface and enhance the overall appearance of the table.

